Showing posts with label quilting mistakes. Show all posts

Sunday, December 7, 2014

Mondrian Riff Mini-Quilt/Wall Hanging


So, if you know Piet Mondrian's work (above) and you quilt, you have likely had the same idea - ohhh, I could make a quilt like that. This weekend, after thinking about it for awhile, I decided to give it a try. Below is my first attempt. 


I chose colors and then created the design on my design wall (a reversed plastic table cloth). I like it a lot, but learned one VERY important lesson. Do NOT, I repeat do NOT steam press a light-colored square without first removing all the black thread remnants. I do not pre-wash my fabrics and the black just melded with the yellow in one tiny, irritating spot. ARRGGHHH!!

I was making this as a Christmas swap gift, so back to the drawing board. The tiny black dot that would not bother me if I were making this for myself is just too irksome as a swap gift.

I am making a tutorial for my next Mondrian. Stay tuned.

Sunday, November 30, 2014

Long Arm Quilting Experience

Well, a couple of weeks ago, I went back and used the long arm quilting machine (HQ Avante) at the LQS that rents them out. It was quite a different experience from having an instructor beside me all the time. From 10 paces on a fast horse, the quilt looks fine (if you don't look too hard at the bottom left corner).


Below are my mistakes. First the close-ups that show the funky quilting pattern and the wrinkles.


Now for the specifics: 
  1. Loaded machine backwards, despite instructions I wrote and photos I took during the lesson.
  2. Had a terrible time with the basting stitch designed to hold top of quilt in place, so I have some very wrinkled quilting near that basting stitch. I am going to assume that washing will make the quilt all wrinkly.
  3. Had a mess on the back of the quilt from a bobbin issue that I didn't see until I got the quilt off the machine. Thank the gods it was only a small part of the quilting. I had to rip that part out. Ripping out thread after you have quilted is TIME-CONSUMING!
  4. Shop did not have the color thread I needed, so used a color I am not that enthused about, but I am living with it.
  5. My quilting pattern is funky to say the least, but functional (see above photo). I was trying for waves and ended up with sort of waves and circles.
  6. Quilting when you are renting a machine is tiring. No time outs for tea or to think about what to do. Just quilt, quilt, quilt. I was dead tired at the end of the session - 4 hours to do a lap-sized quilt. It took so long because I had to wait to get help because I kept making mistakes. LOL.
  7. I have decided to quilt the red section in red, so I am in the process ripping out thread because the contrasting color just looks tacky. While quilting I thought I needed to do red, but then thought, but I will never finish it, so went back and quilted it in same color as the rest. Big mistake! You can really see the funky quilting pattern here. Looks horrific. The other is somewhat hidden because of the thread color.
Will I rent the machine again?
Probably. I would prefer to have my own midsize quilter, like an HQ 16. However, that is unlikely to happen anytime soon because of cost and space, so I am going to have to get better at free motion quilting without a stitch regulator or get creative with straight line stitching.

Lessons Learned
  1. Use thread color that matches. 
  2. Don't try new patterns on a quilt you are giving to someone :-).
  3. Take matching thread with you.
  4. Take a quilt to practice on that you will keep and abuse.


Saturday, October 4, 2014

Quilting Help - Worried about Back to Front Mood Conflict

Below are photos of my IB front (soft, sweet, bird-filled) and back (vibrant, slightly chaotic). The moods strike me as really, really off. Plus the birds on the front are more orange-red and the red on the back is definitely a blue-red.


Do I save this back for another quilt? Don't want to, but I am afraid I am going to have to.

P.S. I also need to get better with photos. The last ones have looked blurry to me.


Saturday, May 17, 2014

Quilted Cat Pads

While I realize it may be a little strange to title a post "quilted cat pads," I have made a cat pad with leftover cutouts from another project. I made the cat pad because one of my cats, Willow, loves to sit with me while I quilt. The problem is that she sits ON whatever it is I am quilting. If you know anything about cats, you will see that Willow is NOT happy about me nudging her off the quilt.


Talk about tiny stitches when you are trying to quilt with an 11-pound cat on your quilt. Because she is normally a very sweet cat, I decided to make her a cat pad. It had to be quilted because she only sits on the quilted parts--a picky cat.


At first, she didn't seem that enthused about her own quilt, but seems to have warmed up to it. I will really see if it is going to work when I quilt another largish quilt on my machine and stretch it out across the table.  Below are two photos, unfortunately on a cloudy day, of the cat pad--based on monochromatic napkins designed by Rachel of Stitched on Color for her color theory class. I learned a lot in that class! I love these colors and have to get back to my LQS to buy some more fabric before it is gone. Once I buy more, I will post the fabric information.


Jaspyrr just totally ignored the quilt, so it is a good thing I didn't make him one! Please ignore the weeds in the photo. I really have to get out there and plant some catnip or something prettier.


Tallulah, on the other hand, wanted to make the quilt her own. I guess she gets the next quilted cat pad.


Sunday, March 30, 2014

Jelly Charm Mistakes

Well, in my "on a roll" sewing, I made a major--now I have to rip seams--mistake. I love the quilt, but I am not going to be able to make squares of sashing that match unless I rip.


I like the blue around the piano keys, but those of you who know how to quilt will see my problem. If I add the blue sashing to the top and bottom, then I will not have a square of blue, but instead a strip of blue going all the way across the quilt. I have done this before.  See the photo below. For that quilt, I thought--oh never mind, it will look fine. For this quilt, I want a square, so out comes the seam ripper.

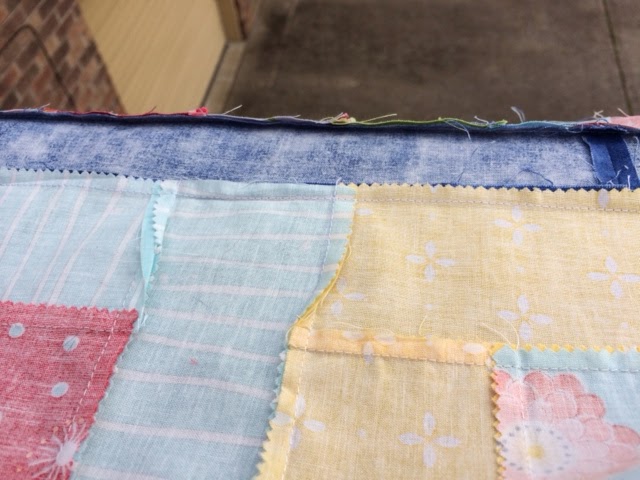
I didn't just mess up the sashing. In my last blog post, I mentioned trying to nest seams, so "refolding" as I sewed. Here is the mess you end up with. Thank goodness I figured out it didn't work rather quickly, so I don't have too much of this. Now, as a beginning quilter, I think--it is on the back, so it shouldn't matter. From reading blogs and taking Craftsy courses from experienced quilters, I know that this seam will create a lump in my quilt. I didn't rip this. I am going to live with the lump.


Oh the joys of learning to quilt by video and blog. If I had been taking a face-to-face class, I doubt I would have made these mistakes, but since the local courses are offered primarily when I am at work, Craftsy and blogs are now my companions. I need to join a quild.